Wednesday, August 3, 2011

NEW PROJECT - Reverse Applique

Last night (well, actually in the wee hours of this morning), I did my first reverse applique.  This is when the main item, a shirt in my case, is trimmed off of or away from a fabric that is placed underneath.  I'd been wanting to try one of these designs.  So when I monogrammed a shirt that I wasn't happy with, that gave me the perfect opportunity!  Bye Bye monogram.  Hello Cute 'Lil Apple!  The new shirt is perfect for back to school or Fall apple picking!
Here's where I started...this monogram will be cut out in a later step.  I have the fabric that will be the apple underneath the shirt inside the hoop.


I took this next picture because I was amused by the machine's report that this takes 6 minutes.  That's 6 minutes of stitching - doesn't include choosing the design, thread & fabric, hooping the shirt, trimming, ironing, etc.  It'll be worth it in the end.
Anyway....I rotated the design 90 degrees and away we go.....


The tack down stitching is done & the monogram is trimmed away.  (Except for that small little bit at the top, but I'll take care of that.)  Then there is a decorative stitch that goes around the apple to hold everything secure.  The inside edges of the knit won't fray.


There you have it!  And I've now added apples & caramel dip to the grocery list!  YUM!

Thursday, May 26, 2011

From Blah to Ta-Da!

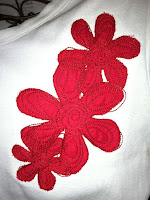
Recently, I discovered http://www.meringuedesigns.net/.  She sells wonderfully digitized modern embroidery & applique designs.  I purchased the Scribbled Daisy design last night and I see many more purchases in the future!  Just wanted to take the time to show how I brought new life to this plain white t-shirt.
 
Nothing exciting here.....


  Ta-Da!!

Here's the neat part!  Instead of turning to my fabric stash, I turned to the stash of clothes that I know I'll never wear again - primarily due to the fact that THEY DON'T FIT & I'm in DENIAL about the fact that they NEVER will again. So for my sewing & applique friends, don't fret over clothes that are too small or accidentally get dried in the dryer!  Cut them up and "re-purpose" the fabric! 
Close up - love the scribbles!                                             Shirt I haven't worn in years


A New Look!

Thanks to Facebook, our world is a lot smaller than it once was.  I've met and done business with people in many places in the US and even a sweet lady in the UK.  Just a quick "Thank You" to http://www.facebook.com/CherishedMemories who helped me with redesigning this blog, my logo & business cards!  Even though our correspondence was only virtual, I feel like she could have been a friend just down the street.  I love The Plaid Pineapple's new look!!

Tuesday, April 19, 2011

Sewing For Those I Love

One of the greatest things about sewing is that I'm able to give someone a one of a kind, personalized gift.  I love thinking about the person while I'm choosing fabrics and patterns & hope that they will enjoy using their gift as much as I enjoy making for them. 

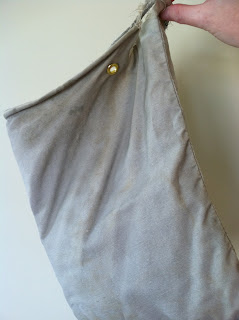
The latest gift is a laundry bag for my niece, Brittany.  She turned 18 yesterday & is college bound in the Fall!  So, I am hoping her gift will serve her well as she goes down this new road of freedom & responsibility - laundry responsibility!

I sort of had this blog post planned in my head so I took pictures along the way.  But as my Daddy used to say, "I've just hit the high spots."  This is not intended to be a tutorial but hopefully it may inspire you to try some of the techniques like zippers, buttonholes & french seams.

Before I go any further, let me stop at give credit to http://sew4home.com/projects/storage-solutions/667-back-to-school-drawstring-dorm-laundry-bag for the clear and easy to follow pattern.


In my world, good things become great when personalized.  So I had to choose a color for a "B" on the pocket.  Which do you like?  I'll show you what I decided on later in the finished product.... (no cheating & scrolling to the bottom)


The double row of top stitching gives it a professional look!  Can't take credit for that though...pattern told me to do it.  This shows the two pieces being joined together in the middle.

If you sew and do not own Steam-a-Seam, so get some today! 

I think I paid $3.55 for this package at the "expensive" quilting shop in town, so I'm sure you can find cheaper at Hobby Lobby or Joann's with coupon.  But, it's worth every penny!  It makes zippers much easier to attach & helps hold hems down for sewing.
The pattern called for turning the pocket sides in 1/2" all the way around.  I had chosen outdoor fabric for durability and folding that thickness only 1/2" would have been tough without help from my friend "SAS".  I also use this when I attach ric rac or ribbon to projects.


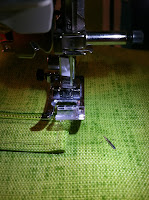
Did I mention this was outdoor fabric?  Sooooo, maybe if I'd used a heavy duty needle, this wouldn't have happened!?  The thickness of the fabric and the zipper teeth were just too much and I broke a needle sewing the pocket on....into THREE pieces!  It happens...


French Seams are SEW cool!!  I am a visual learner, so the first time I did a FS, I just had to do what the pattern told me to do and see the finished result before I "got it".  Just take some scrap pieces and play with them to see how this works.
The bag is sewn up on the side using a french seam.  First, you sew WRONG sides together first (I know, I know....this is NOT how you normally do it!)  Then you trim really close to seam (1/8")  See pics...

Then you fold RIGHT sides together (like you were taught) and sew a 3/8" seam.  This will enclose the raw edges of your first seam.  (See pic below) You can go back & top stitch if you like.  I didn't do this here since it's a laundry bag, not a wedding dress!
Try a french seam in projects like pillow cases or bags when you want a nice finished seam on the inside.  I have a serger, but there are times when I think french seams are better.  And anyone with a regular sewing machine can do them!

The pattern called for a 1" button hole to run the draw string through.  I LOVE doing these on the machine and wonder how they were done before this little contraption was invented.  I have my mother's OLD sewing machine and the button hole attachment looks like a surgical instrument!  I'll just leave it at that.
My sewing friends who are "anti-pinning" are probably going to go a little nutty here.  I'm a fan of pinning because it saves time in the long run when you check and see that all your fabric got caught in your seam. YAY! The writer of this pattern has some really cool math to back up how the circumference of this circle matches the raw edges of the bottom...when I got to the reference to "Pi", I decided to just take their word for it!  So, pin, pin, pin & trust the math!
 Almost done...after I attached the bottom circle to the bottom of the bag, I finished that seam using the serger.  This gets rid of all the straggling strings and reinforces the seam for when my niece feels like she can stuff one more pair of jeans into the bag.  (Sorry the pics are so dark)


 I didn't get pics of the strap construction (told you in beginning this was just the "high spots") But this is finished strap that connects the top & bottom of the bag.
This pocket was my favorite feature of the bag.  It can hold change for laundry, student ID, keys and it is perfect for Mom to stash a little green into when she sends her Baby Girl back to school. 
 Do you like the color I used for the "B"? 

The pattern didn't give a finished size for this bag, but it is HUGE & I just love it!  It was such a fun project & I hope she likes it!

Monday, March 21, 2011

Unusual Requests

Since friends and family have learned about my sewing obsession (ahem, hobby), I've been asked to do some non-traditional things.  Beyond the hemming of pants and sewing on buttons, I've been asked about a "wrap around your purse strap Velcro thing" (this was how it was described to me ) that keeps your purse from slipping off your shoulder.  A concept that I never really allowed myself to wrap my head around; however, I do believe I've seem them for sale at Joann's.  (Could that have been my meal ticket?)  Then there was the little hammock contraption I assembled to house a pair of Sugar Gliders for a friend. 

The latest request came from one of my favorite Aunts.  She enjoys the lost art of hanging clothes on a clothesline.  I write this with a bit of jealousy because I cannot convince my husband that sheets dried "on the line" are far superior to sheets dried any other way!  Please tell me there are others like me who have childhood memories of running with basket in tow to snatch the clothes off the line before a Summer storm came?

My Aunt's clothes pin bag had seen better days and she asked me to make a new one in bright cheerful colors.  So I believe that's exactly what I did and I'd like to share with you.  What a great way to use one of my favorite prints by Moda and a new flower applique design! 

....and now I await my next request!


Yuck Yuck....

Happy Happy!!


Sunday, February 27, 2011

Desperate Times Call for Potatoes....and whatever else might be close by!

Have you ever just found yourself in a "tight" or maybe just too lazy to go get the proper tools for a job?  Well, it's late and I'm tired and I needed some paper weights to hold down paper on a pattern that I was tracing.  So since I was at kitchen counter, I used what was readily available - potatoes, a box of cheese straws and this cute hippo that I bought for a friend this weekend.
I've seen "pattern weights" somewhere along my sewing journey....but who needs to spend that money when other things will do just fine?

Friday, February 25, 2011

This dress is truly "To Tie For"....

I could hardly wait to share this latest "cuteness"!  There are so many things I love about it - reversible, adjustable using ties at shoulders, a monogram or applique could be added or a button on tab, it can be worn year round by adding a long sleeve tee in the winter, can be worn as a dress or a top!


 See on the polka dot side that the coordinating print shows as a trim around the hem.....PRECIOUS!!

Tuesday, February 15, 2011

Here Comes Peter Cotton Tail!

In just a little more than two months, we will celebrate the resurrection of my Savior, Jesus Christ!  My Mom always took great pleasure in making an Easter dress for me.  I never knew or appreciated how much time and thought went into those dresses until I began sewing.  Oh, how I wish I still had one of those dresses!
I remember going to Sunrise Church Service at Empire Baptist Church as a child.  Just a handful of brave souls came in the chill of the Spring morning to sing, "Up From the Grave He Arose".  If the church doors were open, we were there!  Then, it was back home to redress and back to church again at the normal time.  Then, on Easter afternoon, we'd trek (literally) to Rhine, GA for, what in my child's eyes was, the largest Easter Egg hunt in the world at Benevolence Methodist Church.  Family that we would only see once a year would hide hundreds of eggs while the children waited inside the church for the "Ready, Set, GO" call.  Last year, my Aunt, cousin, my son & I went to Easter service at Benevolence and it warmed my heart to let my son experience a taste of what I remember as a child.   
Ok....return from memory lane!
In the Spring, our homes will be filled with the smells of colored Easter eggs, baked ham and fresh cut grass.  If you're like me, just as much preparation goes into what to wear on Easter as what you cook to eat.  So as you flip through favorite cookbooks, don't forget to check out The Plaid Pineapple's latest appliqué designs.  I'd love to personalize your family's outfits and help you make lasting Easter memories too.