On my mission to incorporate burlap into so many projects, I've learned some things along the way. #1 - you can iron burlap (just not with your good iron that you iron Hubby's white dress shirts with) and #2 - how to cut a straight edge on burlap. And this is what I'm sharing today....
Burlap is known for fraying. A little fraying is good, but you don't want strings hanging off of your projects to constantly monitor & trim. This technique gives you a good straight edge and just the right amount of fraying.
First measure the length you'll need. I needed a 20x20 square.
If you look closely, you'll be able to see the threads in the loose weave of the burlap. You're going to separate one of those threads next. Just snip on each side with your OLD scissors.
Choose a nice thick one thread!
Then, you want to gently pull it out.....all the way out. Or in my case, a little more than 20".
Just keep pulling, just keep pulling.....take your time.
The first time I did this, my immediate thought was "Ooooh, burlap ruffles....how pretty!"
Now, when you have the thread pulled out, see what is left for you?
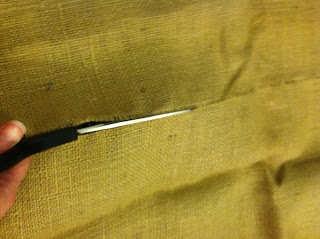
A perfectly straight line for cutting! Magic!
If your thread breaks when pulling, just cut to where it broke, grab it again & keep on pullin'...
Now cut straight up that line. (and excuse the blurry pic)
Now, when you've gone around all 4 sides using this technique, you'll have a square piece of burlap ready for your project.
Remember you can iron burlap. But I'd recommend using a pressing cloth or an old iron.
And here is it! An outdoor pillow with 2" flange. Ok...so there's some sewing in there, but that's for another post.
I hope you'll be able to use this technique in your burlap endeavors. If you try it & love it, I'd love to hear all about it!


No comments:
Post a Comment